

| < - > Bike — Sitting — Be heard — Push-back — Shield-oneself — Transport — Trailer — GPS — Drink — Camping — Energy |

CYCLE-HIKING LUGGAGE
BICYCLE BAGS
During our first two years of cycling (2005-2006) we used Decathlon's rear bags and mini handlebar bags.
In good weather, no problem… but in rainy weather, despite plastic bags safely added inside… the stuff was very wet.
During our stay in Germany and Switzerland in 2006 we fell in love with the ROLLS of the bag: ORTLIEB.
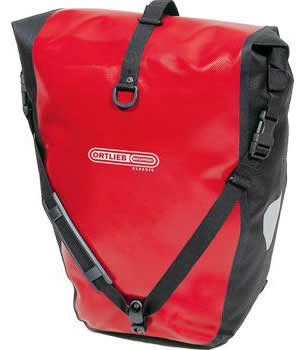
We have opted for the "classic waterproof" model. This is for the front + rear + handlebar panniers.
An investment much tried and tested and appreciated during the summer of 2007 in the particularly rainy vintage. Everything remained completely dry, even on torrential and stormy days.
Another advantage of ORTLIEB: astonishing simplicity and ease of assembly and disassembly on luggage racks.
BAG COMPARISON : ORTLIEB vs VAUDE
In 2015 we replaced our front bags with models of the same size as in the back.
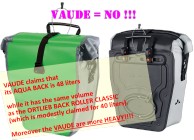
Deceived by the VAUDE ads, we ordered 48 litres VAUDE AQUA BACK (the ORTLIEB BACK ROLLER CLASSIC is advertised for 40 litres). At the reception we were disappointed:
- The VAUDE were strictly the same size as the ORTLIEB
- So either VAUDE overestimates its volume or ORTLIEB underestimates its own.
- The fact remains that VAUDE of equal volume are heavier than ORTLIEB:
- The hull on the inside is very penalizing in weight.
- In addition, this hull will have the disadvantage of making mud cleaning very problematic.
- "Last but not least" : the fabric quality of VAUDE is inferior to that of ORTLIEB.
Therefore we immediately returned these VAUDE and ordered ORTLIEB instead.
CONCLUSION: The ORTLIEB, although a little more expensive, are clearly superior to the VAUDE.
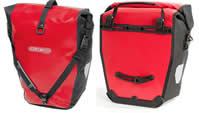
| ORTLIEB BACK ROLLER CLASSIC | VAUDE AQUA BACK |
|
GENERAL OVERVIEW
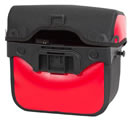
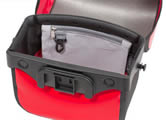
HANDLEBAR BAG
With our ORTLIEB handlebar bags bought in 2006 there was a small defect: the flap closing snaps were extremely hard and difficult to close and open. To counter this defect it was necessary to file very lightly all around the male part.
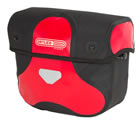
In 2015 we bought some back to get the size above. So by going from size M to size L we have a capacity increased from 7 to 8.5 litres. This is very appreciable. In addition, with these current models (ORTLIEB ULTIMATE6 CLASSIC) the problem of closing the flap has disappeared; the snaps have been replaced by very practical magnets.
By changing to size L, the increase in volume was not in height but in width. This is very good since it is all the more accommodating.
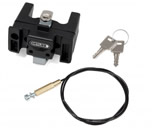
The support bracket, with its seemingly weak wire fastening, in fact provides an extremely firm hold of the bag even on very uneven ground.
BAGS FOR LUGGAGES RACK
As explained above, ORTLIEB bags, although more expensive than VAUDE, are the best choice. Indeed, for the same capacity, they are lighter and of better quality.
REAR BAG
ORTLIEB BACK ROLLER CLASSIC 40 liters bag (identical in volume to the VAUDE, which are falsely claimed for 48 liters)
FRONT BAG
EN CYCLO-CAMPING SANS REMORQUE
In 2015, we have profoundly overhauled our equipment to lighten up our cyclo-camping.
We looked for anything that would allow us to do away with the trailer which, although very practical, is penalizing in terms of overall load carried. We therefore replaced a lot of equipment with their current VERY LIGHT and HYPER COMPACT equivalents.
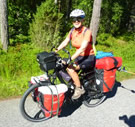
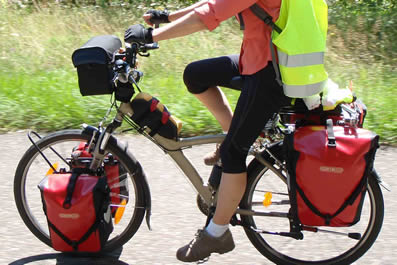
The removal of the trailer was made possible by slightly increasing the volume of the front panniers. For some years now we have been spotting cycloranders with large front bag (of the same size and model as the back). We had successfully tested it on one bike in 2014.
Therefore we have generalized it in 2015. We now have the same bags in the front as in the back, the ORTLIEB BACK ROLLER CLASSIC 40 liters.
In this configuration, the lower luggage rack lug does not attach perfectly to the front luggage rack. Also these front panniers may spread slightly in the lower part when jolting on the road.
To completely solve this inconvenience, simply place a tensioner horizontally on the lower part of these front panniers. Moreover, to have our rainwear at hand, we place it on the front panniers by holding them by 2 tensioners placed vertically. Thus belted, the bags do not move a hair.
WITHOUT CAMPSITE (OR CAMPSITE WITH TRAILER)
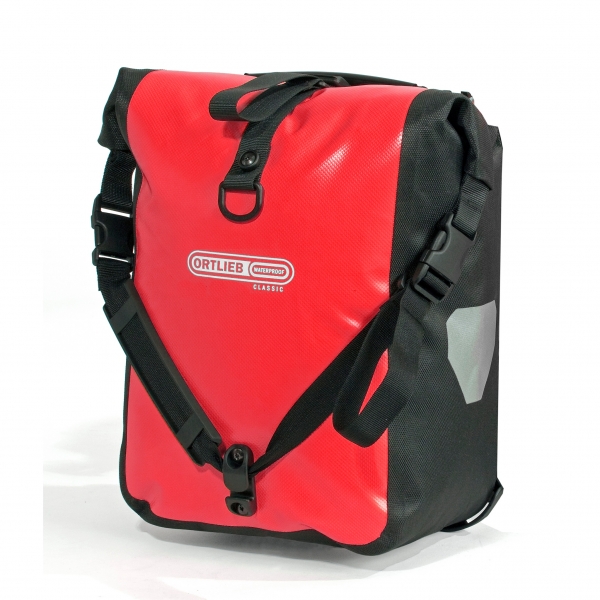
Whether you're cycling without camping or cycling with a trailer, the bags designed for the front are perfect.
We had in this mode the ORTLIEB FRONT ROLLER CLASSIC, now renamed in ORTLIEB SPORT ROLLER CLASSIC :
| Sacoche Avant | Cyclorandonneur "Sacoché" | Sacoche Arrière | ||
 |
 |
 |
TENT BAGS
WITHOUT TRAILER

The arrangement is as follows:
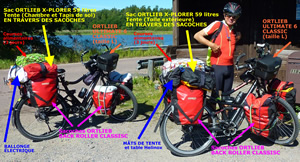
- The outer tent is in a waterproof bag ORTLIEB X-PLORER 59 litres, placed on the rear bags (crosswise).
- The tent poles are in their original bags, placed behind the tent bag.
- The chamber's in another leak-proof bag ORTLIEB X-PLORER 59 litres, placed on the rear bags (across), of the other bike.
- The electrical extension cord and the ABUS bike anti-theft cables in any bag behind the room bag.
- Mattress, sleeping bag and chairs are distributed in the front and back bags.
TRAILER PERIOD
On rainy days, the folded tent must not be allowed to wet the inner chamber or the sleeping bags and mattresses.
As a result we had, "in our time trailer", 3 bags ORTLIEB RACK-PACK separated in the trailer:
- Bag 1 (24 litres): The outer tent (possibly soaked) and the poles.
- Bag 2 (24 liters): The inner chamber whose plastic floor part may be wet.
- Bag 3 (89 litres): Mattresses, sleeping bag, chairs and table.
TENSIONERS
TENSIONERS FOR TENT BAGS
Tent bags are placed across the rear luggage rack on the rear panniers. They therefore require serious securing.
Conventional turnbuckles turn out to be too long or too short, making them too soft or too tensed.
The best solution is therefore to use adjustable turnbuckles.
The best of the best is the model SENDOSTOP-SMARTOOLS sold at Castorama :
- Fully adjustable.
- Non-adjustable self-locking hooks.
- Big, strong hooks.
- Large max. length.
- Good elasticity.
- Very strong.
TENSIONERS FOR WATER BAGS AND FOR SHOPPING
For hanging water bags and shopping bags a very functional solution is the Decathlon mesh tensioner.
This correctly embraces objects with uncertain and shifting shapes.
VARIOUS TENSIONERS
For the various attachments, including the belting of the front bags as described above, the Multi-strand tensioners Decathlon are very practical.
The big disadvantage of these turnbuckles is that they are of low quality (as is very often the case with Decathlon). After 2 years (3 years maximum) the internal elastic threads are boiled and the tensioners are all stretched… they have to be changed!!!
All our other NON-DECATHLON tensioners that we have had for more than 10 years are in perfect condition!!
ORGANIZATION OF BAGS
FOR ALL MATTERS
Without organisation, the contents of the panniers end up in an abominable mess, even after the first stage party.
To avoid the headache of constantly rummaging around, a simple solution is to place each item of clothing or equipment (or family of...) in a re-sealable plastic bag.
HARD ITEMS
The most practical models are the Zipper (ZipLock) from Albal. This is especially necessary for electrical appliances and especially chargers with lots of wires. The pile of these devices in the bags quickly turns into a monstrous noodle bag of intertwined and untangled electrical wires.
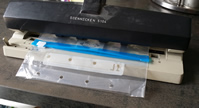
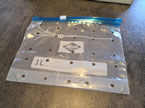
However, a small problem appears: the overall volume increases. This is because air remains trapped in the plastic bags. And even if you don't close them all the way, the air has trouble getting out. The solution is to make a row of holes in the bottom of the bag, where 4 layers overlap to make a gusset. To make these holes in a simple, quick and regular way, a trick is to use a paper punch. See photos in the next chapter "Wet Business". If you do this, all bags will be completely emptied of air when stacked in the bags (thus avoiding any loss of space).
FLEXIBLE OBJECTS - CLOTHING
At home we all know about compression bags. You fill them with your off-season clothes, vacuum them with a hoover… and you can store them in a minimum of space. Unfortunately, it is difficult to take a hoover with you on a hike!
But in 2020 we found the solution: the vacuum-free compression bag. It's here Amazon.DE, Amazon.CO.UK, on Amazon.IT, on Amazon.ES.
It is truly magical. You fill the bag, close the zipper, roll it up (starting from the zipper and going all the way down)… hop, the air is gone. And when you unroll the bag, you end up with a nice flat cake.
At first we were quite sceptical. So we tested them on some of our stuff at home. Even after several months the bags were still quite flat!
As a science and technology buff I am frustrated that I don't know what the manufacturing process is based on. I suspect that the bottom seam is microperforated. But with a particular technique that allows the non-return valve effect. One hypothesis would be that there are micro-holes made in a plastic material so flexible that the internal pressure (by rolling up the closed bag) forces them to open; but that normally the atmospheric pressure crushes them, and thus closes them. In any case it is simple, cheap and VERY effective.
They accompanied us successfully during our 2021 trek… we adopted them.
WET OBJECTS
However, some equipment retains moisture after use. For example, toothbrushes, toothpicks, sponges.
It is of course advisable to wipe them down AS MUCH as possible before packing them up to put them in a bag. But their plastic bag smells very bad if the trip lasts several weeks. This is a sign of intense bacterial activity...! Even if you don't close the bags, the phenomenon still develops.
The simple solution is to pierce the bags with a large number of holes to ensure good aeration without altering the strength. The even distribution of holes over the ENTIRE surface of the bag is essential for successful aeration.
The trick to making these holes is the same as for non-wet cases, i.e. using a paper punch. In addition, folding the bag on itself multiplies the number of holes simultaneously made.
 |
 |
